No products in the cart.
Acrylic Block Prints, Acrylic Prints
Acrylic Picture Mounting
04
Mar
Mar
ACRYLIC PICTURE MOUNTING & HANGING TIPS
The Acrylic Picture mounting way to present your images will give your interior a contemporary, seamless and uncluttered look.
Acrylic prints are made with Ilford Professional gloss photo paper. The face is then mounted to a sheet of speciality acrylic, before having an aluminium composite backing and floating hanger attached.
The outcome is breathtaking. The acrylic gives your images almost a 3-Dimensional or backlit look as well as protecting your image for life.
The floating hanger means your piece is ready to hang and has a floating appearance on the wall.
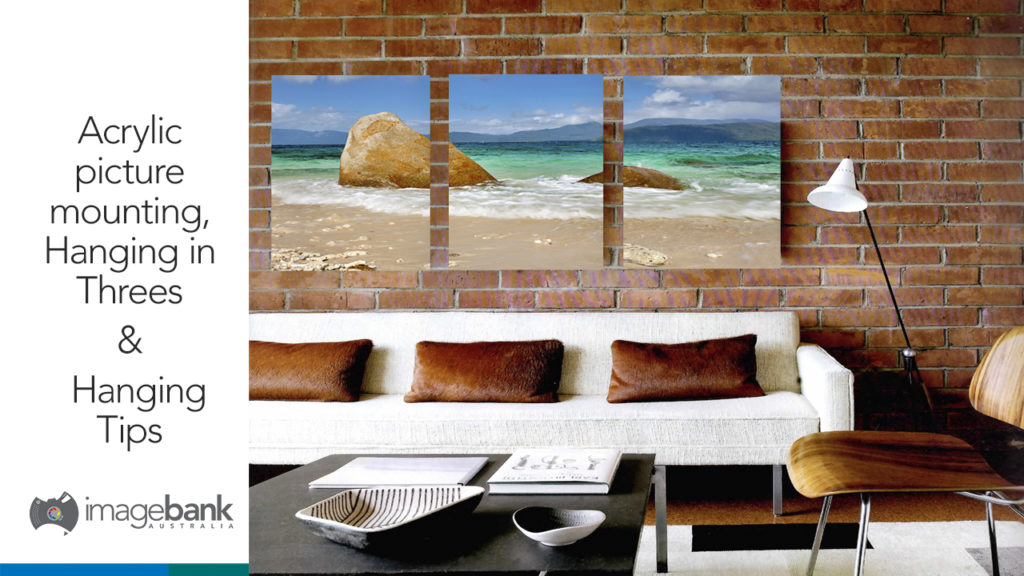
HANGING IN THREES
Having a photo or Acrylic picture mounting is one of the best ways to give your unique image the stunning finish it deserves.
The clarity and quality offered by acrylic face mounting are second to none, making the image pop no matter where it’s placed in your home or office.
When considering acrylic picture mounting displays where there is more than one image, it’s natural for the human eye to view art hanging in threes.
The eye will naturally start at the first picture then travels to the third in the sequence. When two images are hung together, the eye is confused about which to look at first.
Other considerations when acrylic picture hanging is the size of the picture in the space.
It’s position on the wall, peripheral vision, what else is in the room; colours, textures and light source.
Try to tie in your picture so that it fits comfortably into the scene.
DIRECTIONS FOR AN EASY HANG
- Determine where you want your Acrylic picture mounting to hang, checking that you have the right kind of wall fixing picture hooks to suit your destination wall. We recommend two hanging screws in the centre 1/2 of the print.
- Position your image flat against the wall and gently mark the wall at the point of the top left and right-hand corner of your artwork with a pencil
- Put down the artwork.
- Measure in/across 1/4 of the hanging rail from both sides at the top of the artwork and then down 50mm from the ‘top’ of the artwork, make another pencil mark on the wall at these two points (this second mark now shows where the metal hanging rail is on the back of your artwork).
- Position your screw (not supplied) so that the Screw sits on 2nd pencil mark and in line with the 1/4 in pencil line attach the screw to a wall (we would recommend you use flat head screws in wall plugs or screwed type picture hook for the largest acrylic prints).
- Carefully hang your artwork on the two screws and using a spirit level ensures the artwork is level.
- Use an eraser to rub out the corner marks on the wall gently
- After Hanging your acrylic picture mounting stand back and enjoy!
An example of Acrylic Picture Mounting at Perrin Clarke Photography